
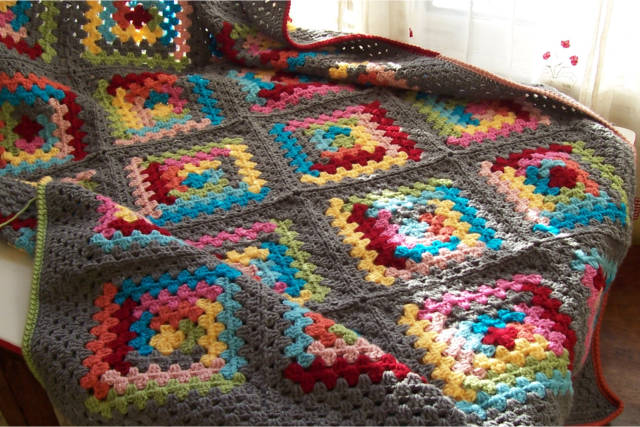
Lots of tedious sewing and weaving of ends has been done! I don’t have a photo of the entire blanket, but you can get the feeling of it in these…

a bit closer look… Continue reading “Small Granny Squares Blanket”
Lots of tedious sewing and weaving of ends has been done! I don’t have a photo of the entire blanket, but you can get the feeling of it in these…
a bit closer look… Continue reading “Small Granny Squares Blanket”
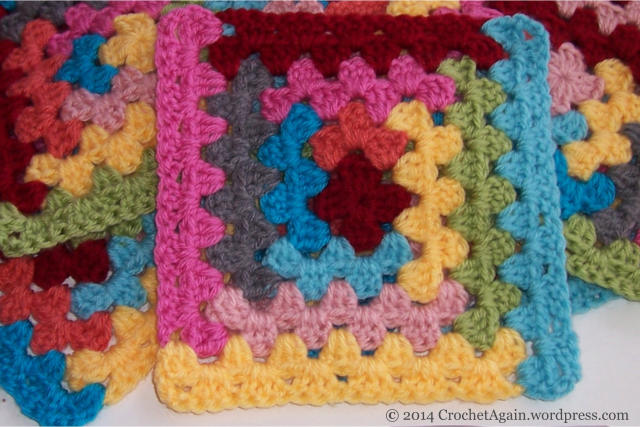
You can’t make just one…

The colors are brighter than in the photos, nice rich fall colors. I think the solid center one is my favorite, today at least…
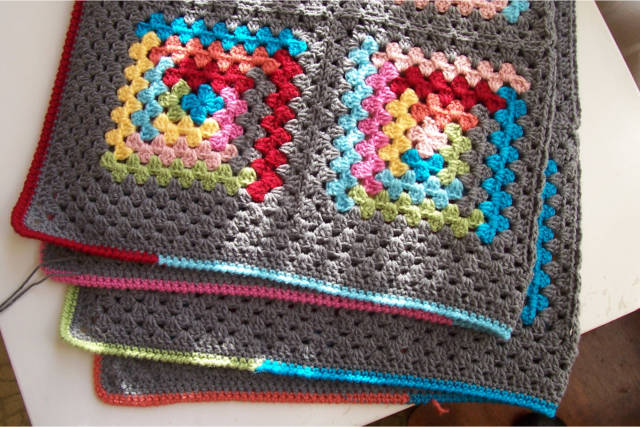
Almost done, just need to weave in the ends for the gray border and multi-colored edging. It was too cold outside for me to want to take any photos out there (in the teens for the high and windy!), so I had to take them next to the sunny kitchen window. Not room enough for a full view.
I made 20 of the log cabin granny squares, and then did 2 rounds in gray around each square, joining them join as you go in the last round. After joining the squares, I went around the whole blanket with 4 rounds of gray. Then I did 1 round in gray of single crochet, crocheting into the chains on each corner space, with 3 sc in the center chain (not in the chain 3 space, in the individual chain stitches).
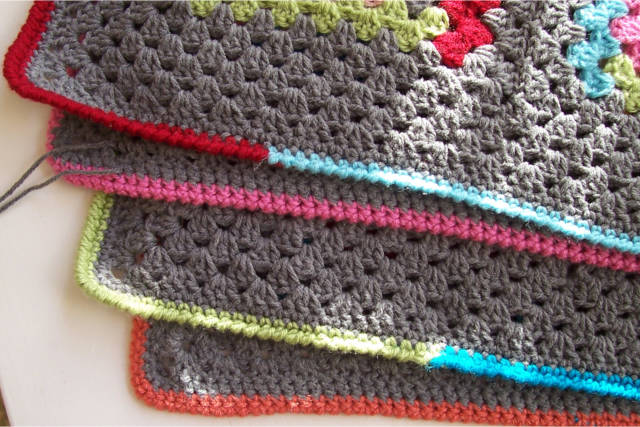
Then I did 1 sc round changing colors as I went so I had some of each color. I didn’t end off when I changed colors, which was a bit of a pain to have all those attached, but I could pick them back up when I did my final round of reverse single crochet (also called crab stitch). I like the kind of edge that stitch makes, it looks nice and finished. Here is a closer look at the edging (front and back)…
Here is a quick tutorial on how I am going about my Log Cabin squares, it is just a variation of a typical granny square (please let me know if you see any mistakes in the directions)…
Update (and update corrected): post with pics of the finished Gray Area Log Cabin Blanket which shows what I did with the border, for an estimate of the yarn used, go to the Log Cabin Blanket post.
Start with a sliding ring, and make a 1 round granny square. To do that, in the sliding ring you ch3 (counts as 1st dc) 2dc in the ring, [ch3, 3dc in the ring]3 times.

End with a ch3, tighten the loop, slpst into the top of the first ch3. End off.

It’s done!! I decided to stick with simple for the border on my Hop, Skip and Jump baby blanket. Rounds of single crochet randomly in the colors of the blanket. I like how it looks and I like the different texture.

If I had to do it again (or had more time to re-do the border) I would do the border with a size or two larger hook than I used for the body of the blanket. I didn’t tighten my tension, but the border turned out denser than I would prefer, it would work best if a bit looser.

But, I was down to the wire! Baby shower is tomorrow and I just weaved in my last end this morning!
I am expecting my first grandchild, and have started the first baby blanket. I love the colors (the photo isn’t quite right, the light aqua is lighter, the light pink is peachier, the yellow nicer, the bright pink less purple-y, at least as it looks on my computer). These are a few Vanna’s Choice (the darker Aqua and the lighter pink) and the rest are Vanna’s Choice Baby.
This is a combination of a regular granny square and my mitered granny, to make one large square blanket. I really like how it is turning out so far, like a modern log cabin in a way.
Since receiving and crib blankets are small, I hope to do more than one blanket in these colors. (and then there are all the other cute baby things to crochet!)

1/21/17: A new version that is done with ch2 corners and a ch1 between the 3dc clusters, diagram for Mitered Granny Square 2.1.
Diagram for Modern Mitered Granny Square.
Link to Sliding ring tutorial, if you would like to start your squares the way I do.
Link to Join As You Go tutorial, if you would like to check out how I like to join granny squares.
These are the directions for the blanket I first showed in the Crochet in Progress post, here is a better photo (the colors look a bit washed out, the sun was bright):
![]()

And a closer look, remember it is posed on a chair, instead of lying flat so the squares look less than square. Continue reading “Mitered Granny Square”
